Triple the Creativity: Christmas Wishes Kit Alternate Ideas
If you’ve been around Red Daisy Crafts for a while, you already know that one of my favorite things to do with Stampin’ Up! kits is to take what’s inside the box… and stretch it WAY further than the instructions show.
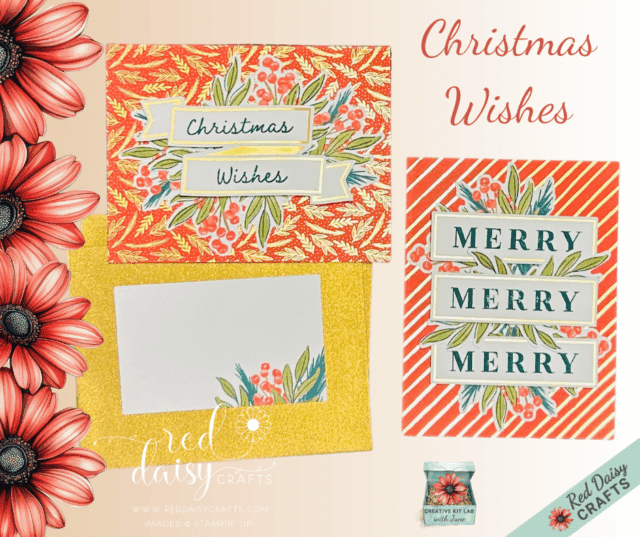
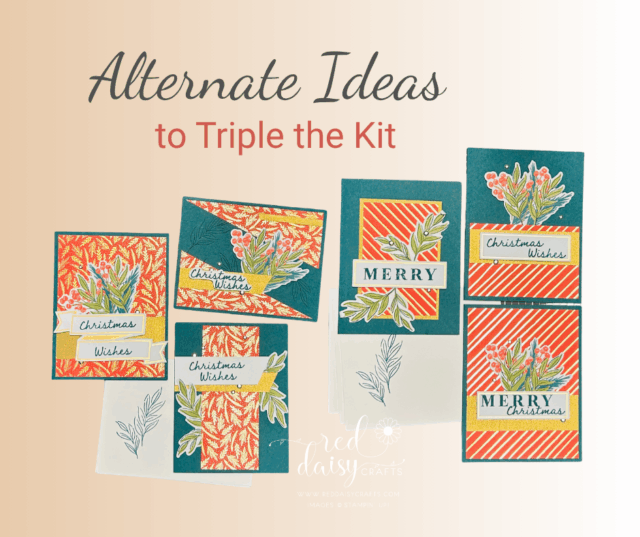
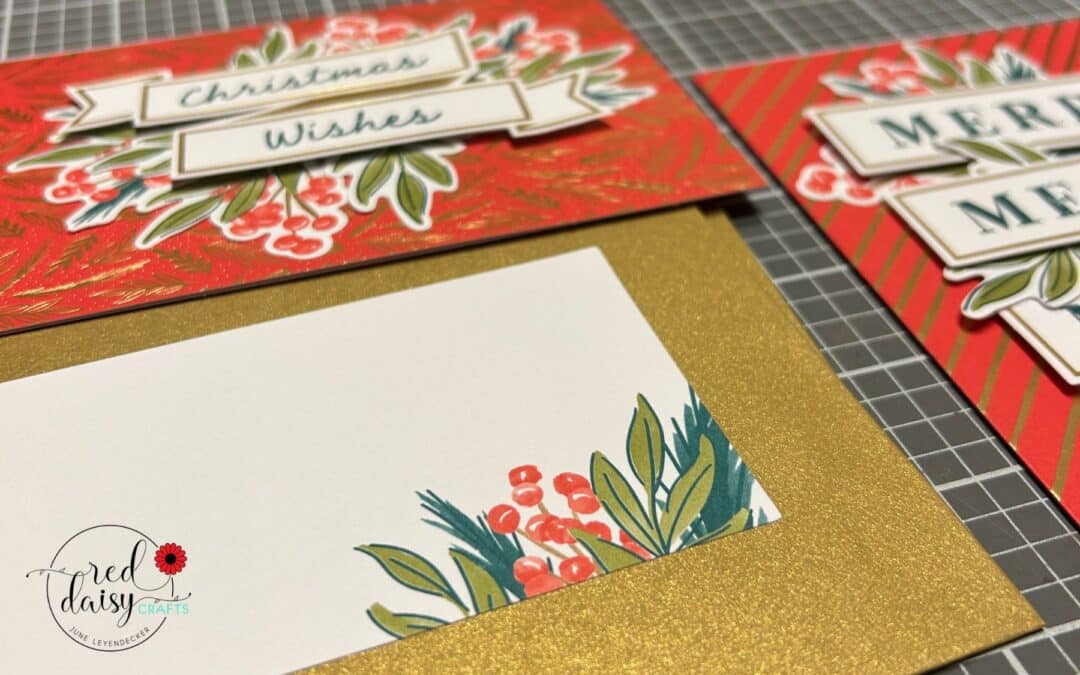
And today I’m so excited to share a fun idea using the Christmas Wishes Kit — I took the supplies for one card and turned them into three beautiful Christmas cards! 😍
Yes, you read that right — one project = three finished cards using a simple mix of cardstock, envelopes, and gems you likely already have in your stash.
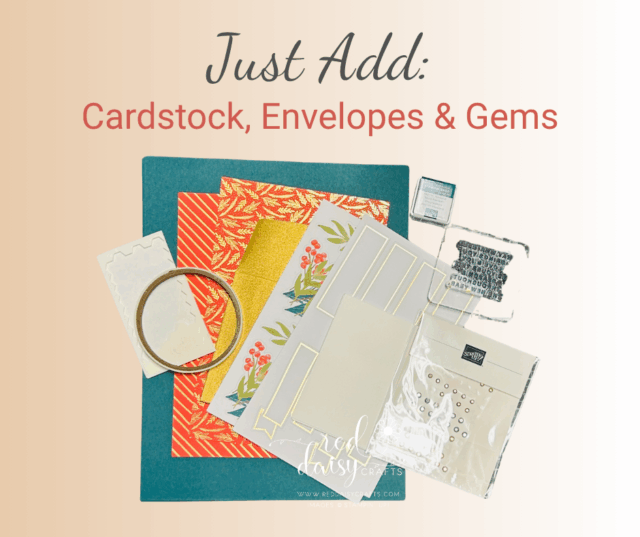
Below you’ll find photos of all three alternate designs and a look at which extra supplies I added so you can recreate them at home.
Why I Love the Christmas Wishes Kit
The Christmas Wishes Kit is already a stunning all-inclusive kit. It comes with:
- Christmas Wishes Photopolymer Stamp Set
- Clear Block
- Pretty Peacock Stampin’ Spot
- Precut die-cut pieces
- Gold-foil accented card bases
- Matching shimmer envelopes
- Adhesive
- Step-by-step instructions
- AND a gorgeous storage box
It’s quick, classy, and perfect whether you’re brand new or a seasoned cardmaker looking for easy magic this holiday season.
But the beauty of these kits?
– They’re designed to be customized.
– They stretch beautifully when you add just a few basics.
– And you can triple your designs without triple the cost!
Tripling the Kit: My Alternate Ideas
Here are the three cards created from the supplies intended for one original design. As you’ll see, you can easily mix & match the patterned layers, sentiment banners, and greenery to craft completely new layouts.

I love how bright, warm, and festive these turned out — full of texture, movement, and in that classic holiday red I adore.
What You Need to Create These Alternates
Along with your Christmas Wishes Kit, you’ll need just a few basics to stretch the supplies:
- Cardstock (Pretty Peacock, Basic White)
- Medium Envelopes
- Gems or embellishments
- Adhesive (seal, dimensionals, glue dots)
This simple combination helps you turn every kit piece into a focal point — giving you more creative options AND more cards in the end!

Step-by-Step Approach (Simple & Beginner-Friendly)
Here’s the formula I used to triple each card:
- Start with patterned panels
Cut the printed layers into thirds or diagonals so each piece becomes a mini background. - Use the die-cut greenery sparingly
One sprig can become two smaller accents. - Add cardstock layers
A small matte layer behind each panel instantly elevates the look and gives you more surface to build on. - Mix & Match sentiments
Layer the banners, duplicate them, or change direction for variety. - Finish with gems or metallic accents
Use the metallic envelopes to add additional accents. Small touches go a long way when you’re creating multiples!
Easy, elegant, festive — and FUN. 😍✨
Why Alternate Ideas Matter
I always say:
Kits are just the beginning — your creativity is the magic.
Whether you’re stretching a kit to make more cards, or just experimenting with new layouts, alternate ideas help you:
- Save money
- Build your skills
- Grow your creative confidence
- Use what you have on hand
- Make each card feel personal and unique
And THAT is the heart of the Creative Kit Lab with June — bringing new life to every kit. 💖
💌 Ready to Try It?
If you’d like to recreate these tripled Christmas Wishes Card Kit designs, make sure you grab your kit now — they’re only available while supplies last!
👉 Add your link to the Christmas Wishes Kit here
And don’t forget to stock up on the extras:
– Cardstock (Pretty Peacock, Basic White)
– Medium Envelopes
– Gems or embellishments
– Adhesive (seal, dimensionals, glue dots)
This season is all about spreading joy, and handmade cards do exactly that. I hope these alternate ideas inspire you to play, explore, and stretch your creativity — one beautiful Christmas card at a time.
If you try these, tag me or send me a photo… I absolutely LOVE seeing what you create!
With holiday cheer,
June
Red Daisy Crafts | Creative Kit Lab with June


